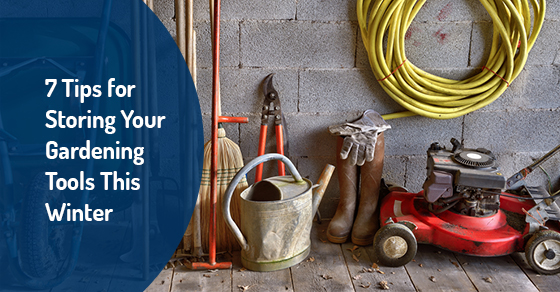
7 Tips for Storing Your Gardening Tools This Winter
As the weather gets increasingly colder and the evenings shorter, you know that it’s time to put away the gardening tools and switch them with snow shovels and other winter equipment. Good-quality gardening tools are not cheap, and leaving them exposed to the icy winter conditions can cause severe damage that shortens their useful life.
If you want your devices to last for many years to come, you must prepare them for short-term storage over winter.
Generally, all tools should be thoroughly cleaned, dried, and treated with the recommended care products before storage. Otherwise, the dirt and sap left on the tools may contribute to the spread of weeds and soil-borne diseases, in addition to attracting moisture that may cause rust.
Cleaning the tools before storage will prevent you from encountering dirty, rusted, and dull tools when you want to use them again in the next year.
Here are some tips for storing your gardening tools:
1. Clean the tools thoroughly
Tools that come in contact with soil, such as spades and shovels, should be cleaned by removing any mud and dirt that can harbour moisture and cause the metal to rust. You can do this using a plastic kitchen spatula to scrape off the dirt. Don’t use a metal trowel for scraping as this could dull both tools.
If the tools are too dirty, clean them using a brush, soap, and running water to loosen the dirt and any crusted material. Use a stiff wire brush or putty knife to scrape off any stubborn chunks. But don’t use the brush on painted surfaces to avoid scratching the surface.
Remove light and flash rust using simple steel wool. A wire brush might also come in handy for removing fresh rust and stubborn dirt. Ideally, you should use a wire brush, sandpaper, and steel wool to brush the tool in that sequence. To remove stubborn rust, you can apply oil to make the process more effective.
2. Sharpen and repair the tools
Some tools may require sharpening before storage, such as a shovel, trowel, hedge shears, and hoe. They are sharpened from the scoop side. You should use both hands to hold the file securely as you push away from your body using long, smooth strokes.
Hold the file at the same angle as the bevel, and push it down and across the blade. Continue until the edge is smooth, even, and shiny, and the bevel is satisfactory. When you’re done, turn the tool over and lay it on the vice. You will feel the rough edge of the metal on the back of the blade. To remove the burr, gently file toward the handle until the edge is smooth. You can also use fine sandpaper to remove the burr. Now, oil the blade.
Before storing a pitchfork, you should straighten any bent tines by driving a one-inch galvanized pipe into the ground, so there’s about one-foot of it above ground and sticking the bent tine in the pipe so you can bend it until it’s straight.
If your pruning saw is dull, you may consider taking it to a professional for sharpening so that they can ‘set’ each tooth to prevent the blade from binding when cutting. But if you have some patience, you can use a small triangular file to sharpen each tool depending on its bevel. Generally, you should sharpen every other tooth on one side and turn the saw to sharpen the remaining teeth. Keep the filing strokes consistent for each tooth to ensure an even cut.
3. Apply oil on metal surfaces to prevent rust
Coat all clean, sharpened metal blades, as well as the metal parts of shovels, rakes, and hoes with a thin layer of machine oil to prevent rust from forming on the surface.
You can do this using a silicone spray, rubbing the tool with an oil sock, or preparing an ‘oil dip’ by adding engine or vegetable oil to a bucket of sand and then dipping the tool’s head in the bucket during storage.
4. Clean and repair any damaged tool handles
Tighten any loose handles by tightening the screws/bolts or driving a metal wedge into the end of the wood handle for tools like axes and heavy hammers.
Repair or replace any broken or damaged wooden tool handles and then rub them with oil before storage. Clean wooden handles using a stiff-bristled brush, and then smooth the surface with medium-grit sandpaper.
Rub the handles with boiled linseed oil using an old rag. This will prevent the wood from drying out rapidly and cracking, which may result in splinters. Repeat the process several times so the wood can absorb the oil to keep it smooth and extend its shelf life. You may also apply a spray rubber coating to part of the handle to prevent splinters, minimize wear and tear, improve the grip, and make it easier to find the tool in your garden.
5. Prepare the hoses for storage
Drain water from your sprinklers and garden hoses and hang them to dry. Check for worn washers in the hose-end couplings and replace them. If there are any leaks, repair them with hose mending couplings.
Now you can coil the hose for storage in a dry and dark place. If you have multiple hoses, consider labelling them, so you know the right spot to use them next season.
6. Prepare fuel-powered tools for storage
Tools such as chainsaws and lawnmowers should be adequately winterized by draining all gasoline from the engine to prevent it from gumming up the carburetor and other parts. You must also lubricate engine parts prone to corrosion and change the oil to avoid any debris sticking to the engine. You should also disconnect the battery and spark plugs and store them indoors for winter.
7. Store tools in a dry place off the floor
Don’t leave your spade, rake, shovel, and other gardening tools leaning against the wall as they cause trip hazards if they fall over. Instead, store them upright using available options for organizing tools on the wall, such as hooks that secure the handles to the wall and keep them safely stowed while providing enough room on the floor for fast access.
Put smaller tools in a bucket caddy. They’re designed with multiple pockets to store items of different sizes, so they are easy to find and carry.
Winterizing your tools for short-term storage may take a few hours or a few days, depending on the number of tools you have and your schedule. But the time and effort will be worth it when you see them ready for winter storage, in addition to the peace of mind that they will be in good shape for the next gardening season.
For more tips on storing your gardening tools for the winter and finding the right short-term storage unit size for your needs, call Abacus Self-Storage at (905) 763-8600 or contact us here.